|
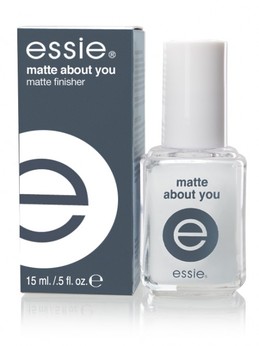 Image via: Nitrolicious.com what it is: Essie "Matte About You" matte-maker top coat why I love it: If you couldn't tell, I really like to have a lot of nail painting options. Matte nails are really a come and go trend, but it's a good way to mix up nail looks. I'm not a big fan of investing in actual matte nail polish, but this top coat gives the look to any normal nail polish for an instant nail update. The matte effect looks especially cool on darker polishes, where you can really notice it and can tell anti-shine is the desired result, and now that it's fall, this is the perfect time for those colors and any variations you might want to add to them. where to get it: Ulta.com, $10 -E
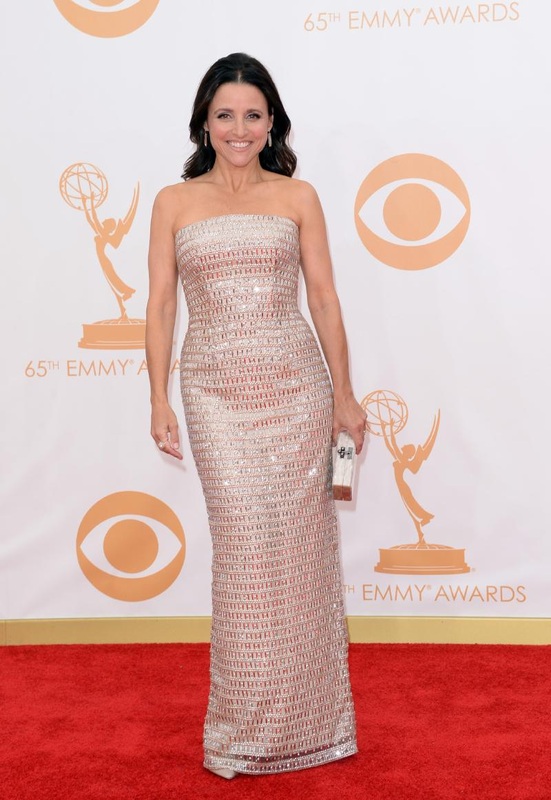
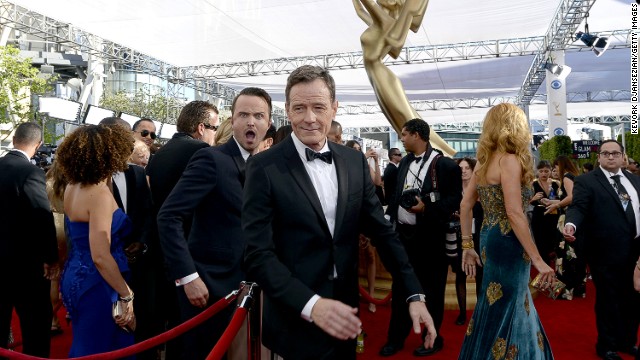 Aaron Paul photobombing Bryan Cranston at the 2013 Emmy red carpet. Like a boss. Image via: Ozarksfirst.com Everything feels right in the world now that awards season has finally officially begun. In keeping with recent years' trends, the carpet was honestly kind of a snoozefest, but that doesn't mean the looks can't be broken down into very specific categories and analyzed. What else are red carpets for, anyway? For all the looks at the 2013 Emmys, TheCut.com, People.com, EW.com, THR and the NYDN are just a few places that have great red carpet roundups. the good/bad best | Julia Louis-Dreyfus in Monique Lhuillier: She always keeps it simple and smart, and last night was no exception. The gown fit her well and she worked the all-over sparkles like a pro, keeping everything else simple and winning gracefully (and hilariously, thanks to Tony Hale).
Katrina Bowden in Badgley Mischka: She walks the line between "can wear anything" and "I'm on a multi-nominated show" very well. This is simple and elegant with an interesting back design and front embellishment that might be flattering on most humans, but nothing is unflattering on her. Also, navy instead of black was a nice touch.
| Taylor Schilling in Thakoon: To me, this was the perfect first-appearance dress. It was revealing in all the right places, on-trend in white and interesting, but it didn't ask for too much attention while still evoking the glamour of a gown.
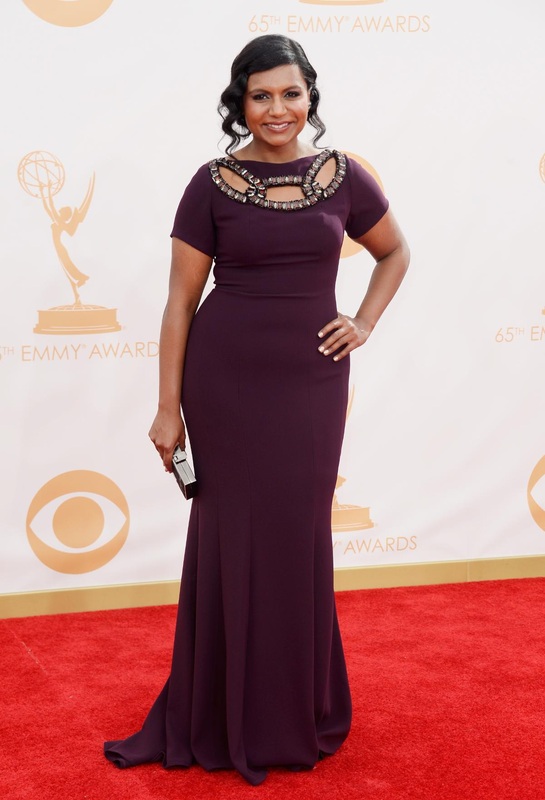
Carrie Preston in Romona Keveza: She arrived at the awards already a winner, and her look reflected that. She kept it simple in a flattering form fitting pale pink gown with a glamorous flare at the bottom, but the black piping and buttons down the back made this extra interesting. She updated old Hollywood expertly. | Mindy Kaling in Edition by Georges Chakra: I can't say this was my absolute favorite, but I think it works well on her and the neckline detail is interesting. I don't love her hair, but the flattering and tasteful dress makes up for the look overall.
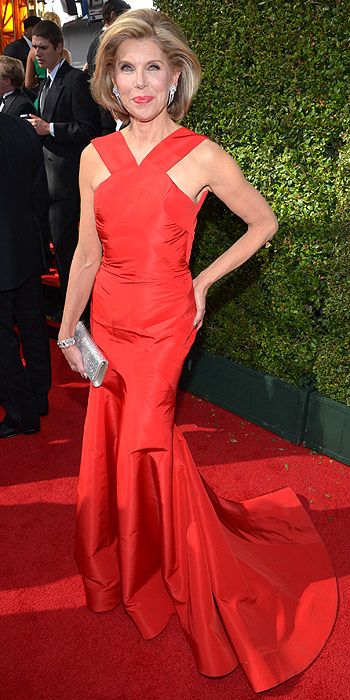
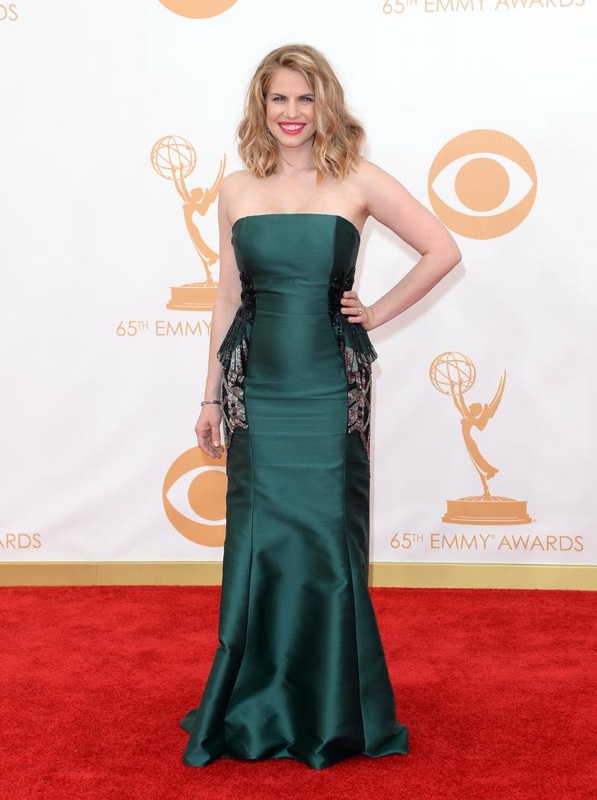
Christine Baranski in designer unknown: As someone who seems to own any place she's in (or screen she's on), the Emmy red carpet was no exception. It might be in nothing-new red, but the silhouette is so flattering and warrants a second look. It's an age-appropriate risk that really worked. Image via: People.com. | Elisabeth Moss in Andrew Gn: This may have been my favorite of the night. Up close the dress has a shimmer and a rich texture, it fits perfectly and her blonde-again hair and red-orange lip are the perfect complements to a simple, but still interesting dress.
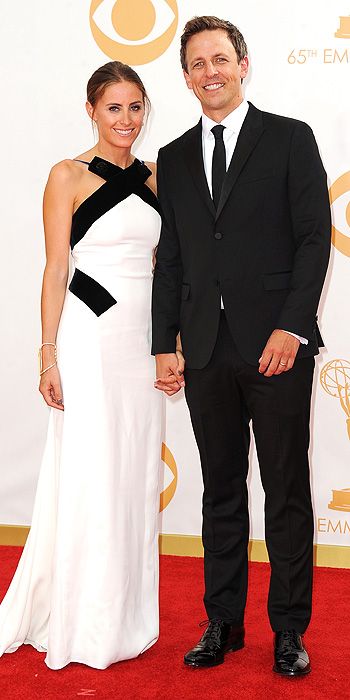
Alexi Ashe in Carolina Herrera: It's hard to make us look away from Seth's amazingness, but this dress deserves a mention. It's flattering and interesting and looks great on Seth's arm while not pretending to steal the show. I'd really like this one for my closet. Image via: People.com.
|
worst. | Julie Bowen in Zac Posen: I think this was my worst dressed of the night. She's small, the dress was large, there was SO MUCH happening on it and it looked like scraps of other dresses all sewn together. It makes me so sad.
Anna Chlumsky in Badgley Mischka: I first thought of a mermaid when I saw this dress. Not mermaid-style, but an actual under the sea mermaid. The side vents do no favors, and it doesn't seem to fit so well. The unpolished hair and clashing pink lip don't add anything to the look, either. Just a miss. | Amanda Peet in Erdem: This is another sad black dress Addams Family failure. It has little working for it and everything working against it. Overdone sheer black on nude, sheer bottom, baggy in weird places, high neck. All around no.
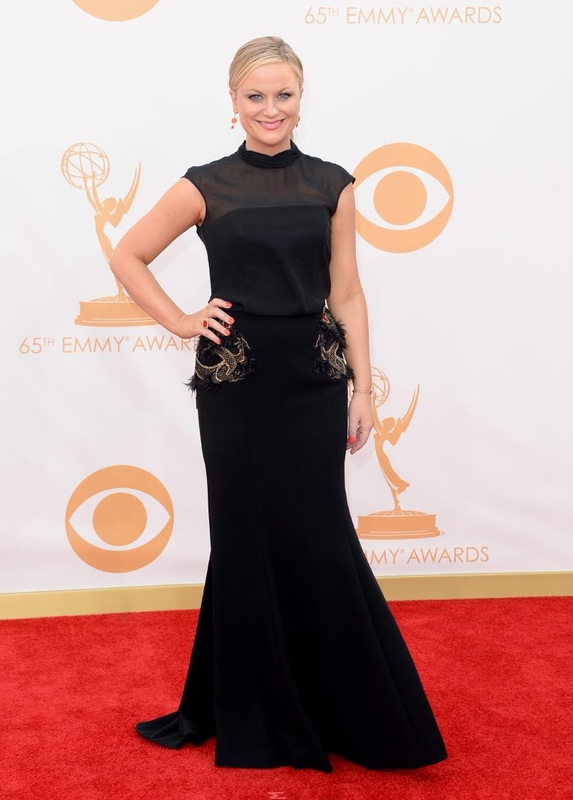
Amy Poehler in Basler: This might make me saddest of all. Despite wearing "a good attitude" on the carpet like she said on E!, this dress is an all around no. It's weird, it's unflattering, it's drab. I so want to like what she wears to match how much I like her, I wish she'd call for help.
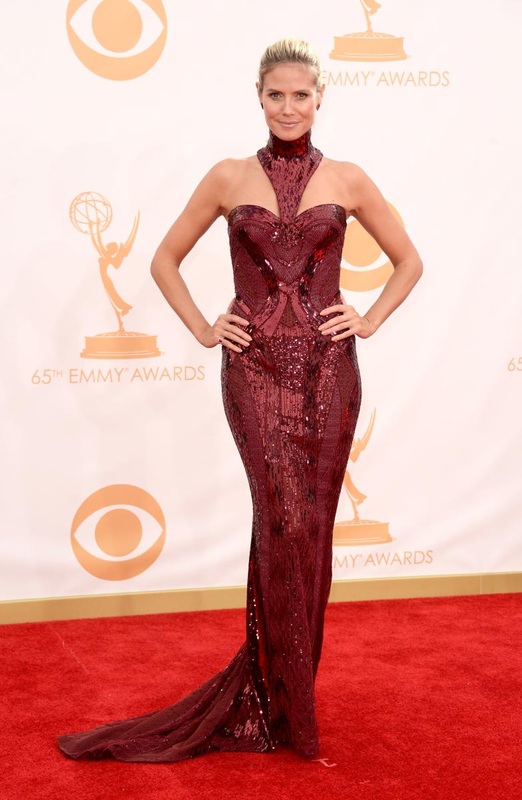
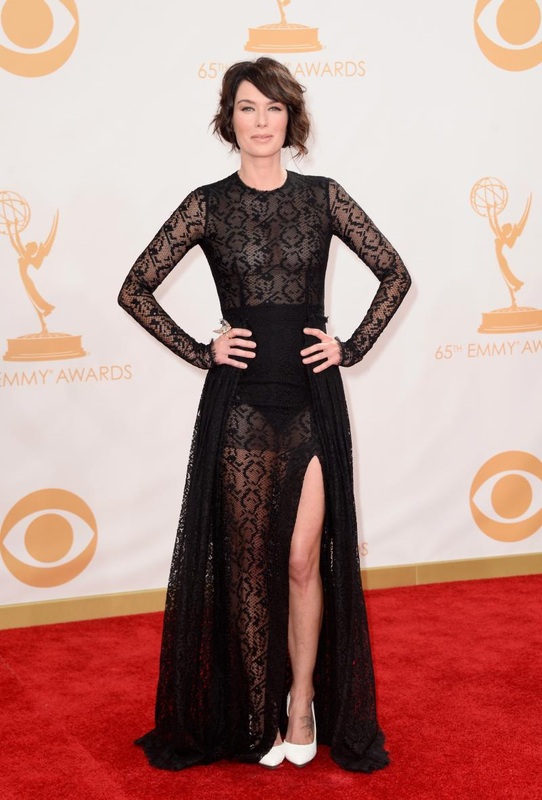
| Heidi Klum in Atelier Versace: This dress maybe might not be so bad without the neckpiece, but I find that part so offensive, and the bodice could probably be more flattering. I appreciate the color of this, but she really looks like she's trying to be dressy Iron Man for Halloween, and I just can't. Meritt Wever in unknown designer: She might have gone with red carpet mainstay black and white, but it's just all wrong. It's unflattering and dated, and though I appreciate the red lip, a younger, more modern choice would have made her great non-speech that much more endearing. | Lena Headey in Alessandra Rich: Oh, Lena. This is so bad. The overdone sheer over granny panties, the snake print pattern, the stark white shoes with all of it. None of it works, and I want some of it to so badly. Cersei would give this the side eye.
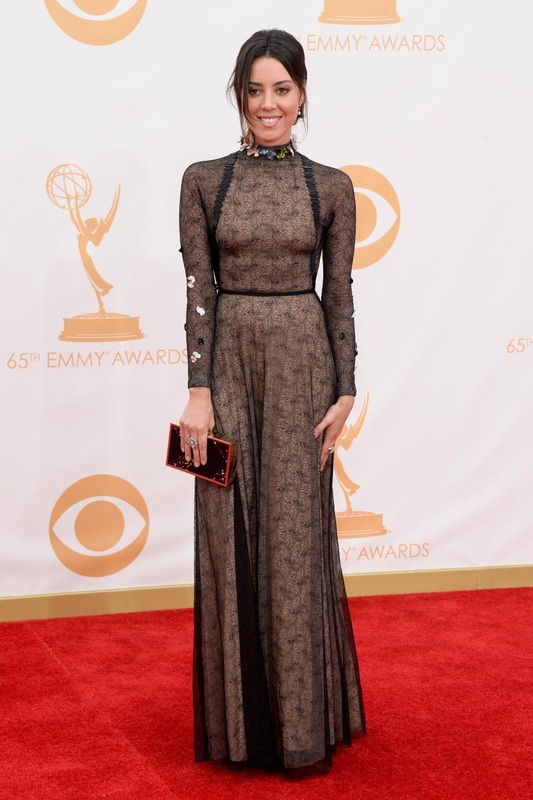
Aubrey Plaza in Marios Schwab: Something about this could convince me that it might not be so tragic with some edits, but this also makes me sad in an Addams Family goes on What Not To Wear kind of way. And flower appliqués on the sleeves...ick. Don't age yourself, Aubrey. Or make poor choices like this one.
|
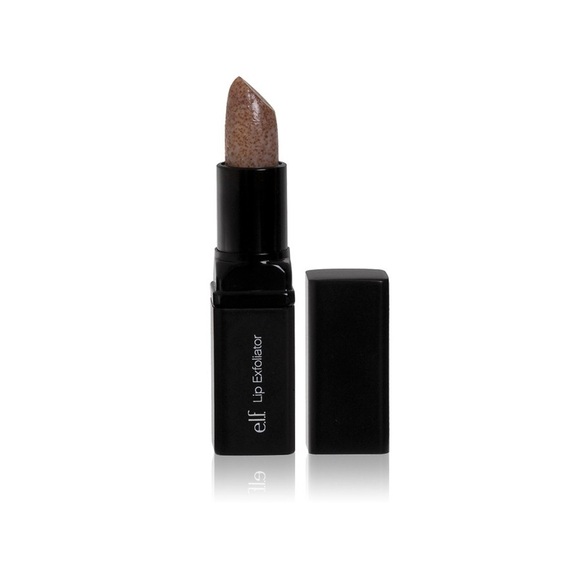
what it is: e.l.f. Studio Lip Exfoliator why I love it: It's common knowledge that exfoliating and bright, bold lip color goes hand in hand, but sometimes people don't want to take the extra step or invest the extra money. This exfoliator is not only cheap, it comes in a no-mess, easy to use lipstick packaging and you can FEEL it working. Some sort of colorful lip is in style every season, but exfoliating is especially important during the upcoming dry, harsh, colder months, particularly if you're going to go for a classic red or deep plum that's having a moment. Just throw this in your bag along with your lip color du jour, and you don't have to worry about flakes throughout the day! where to get it: Eyes Lips Face, $3.00 -E
 Tory Burch, image via: Style.com | 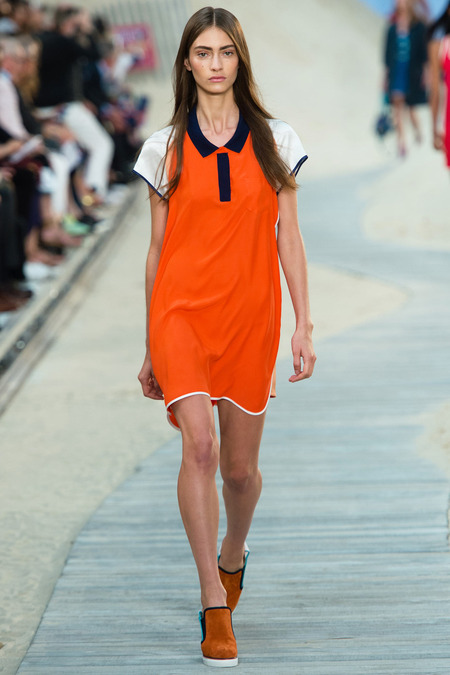 Tommy Hilfiger, image via: Style.com | 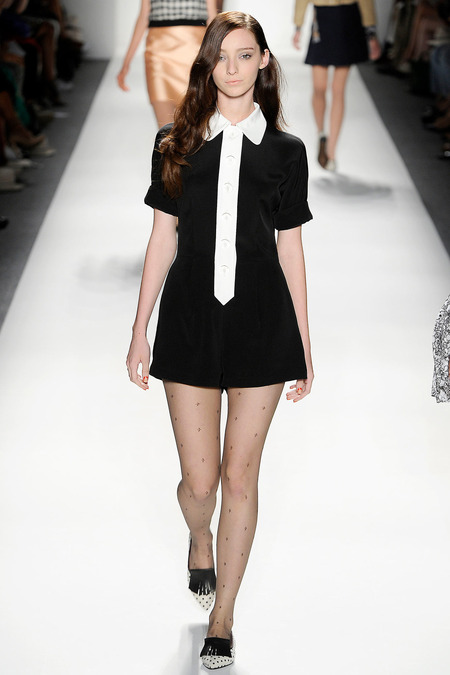 Ruffian, image via: Style.com | 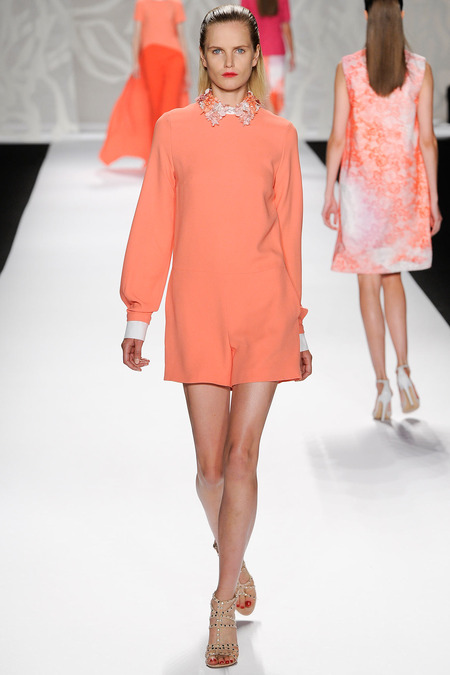 Monique Lhuillier, image via: Style.com | all buttoned up.
Collars used to be a symbol of conservative dress, leaving little in the creativity department and mainly residing in the "corporate" or "preppy" categories of dress. Designers have turned that less than glamorous association on its head in the last few seasons with buttoned up to the neck collars in girly fabrics and eye-catching embellishment, making what used to be boring, exciting. Spring 2014 is no different, and I'm loving the spins designers are putting on the collar, especially on dresses. Sure, there are the expected collared shirts and shirtdresses, but it's been a lot of fun to see the normally starchy neckwear somewhat ironically contrast a shapeless or not so conservative dress in a surprising way.
-E 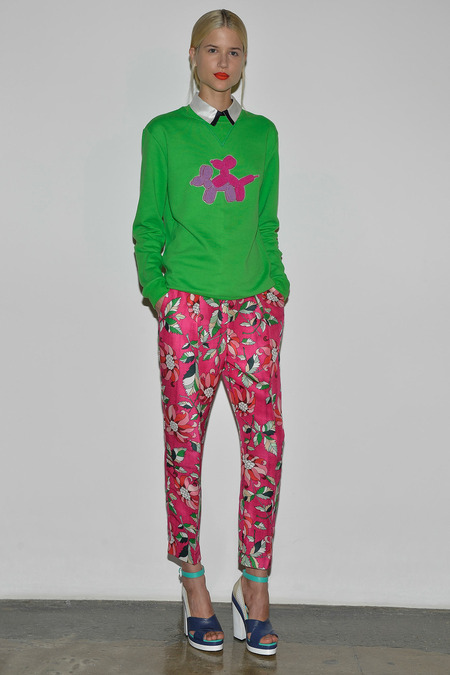 Ostwald Helgason, image via: Style.com In non-dress news, I'm loving this playful look on the sweater/collar layering with bright colors, a patterned cropped pants and a funny, slightly NSFW sweater logo. Great use of the collar to make a look that could skew casual a little more sophisticated. | 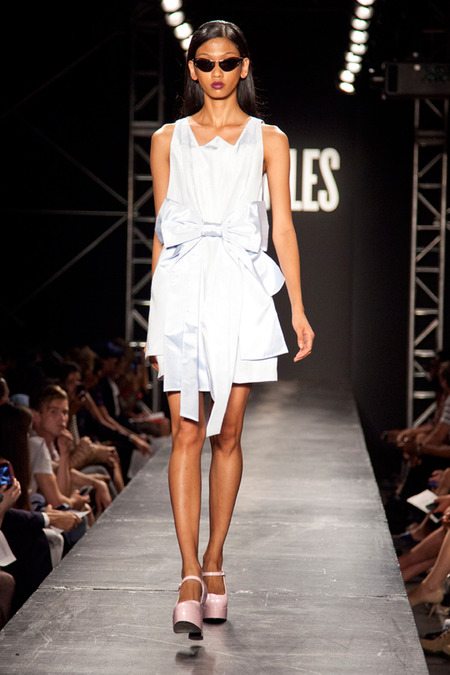 VFiles, image via: Style.com And on the other hand, I love this dress that makes another fun play on the collar by using the shape and placement of one with negative space. It gives an unexpectedly flattering effect to the neckline and adds a lot of interest. |
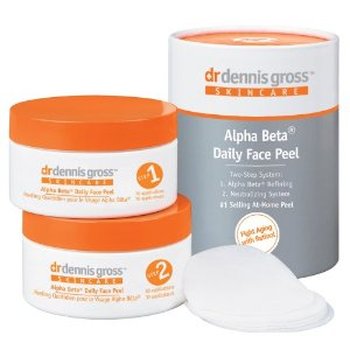
Most people's skin concerns can't be summed up in one simple adjective. It's never just oily, acne-prone, dull or aging; for most of us, it's an unfortunate combination of issues. But whether you're concerned about fine lines, huge pores or dark spots, one of the best tools you can use to improve the overall condition of your skin is an at-home peel. There's pretty much a peel designed for every skin issue, and most of them use glycolic acid or other exfoliators to combat a wide range of issues. They're especially great for fighting blackheads, reversing signs of aging, fading dark spots, minimizing pores and exfoliating for a brighter complexion. Just be careful to use these peels as directed on the package, as overusing or applying to super sensitive skin can cause chemical burns. Here are a few of my favorites: favorite for anti-aging/dark spots:Dr. Dennis Gross Alpha Beta Daily Face Peel, $78, sephora.com
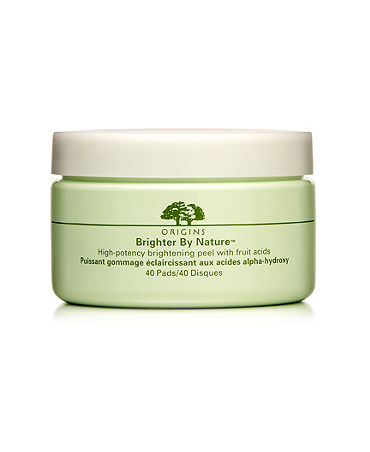
favorite for dull skin:
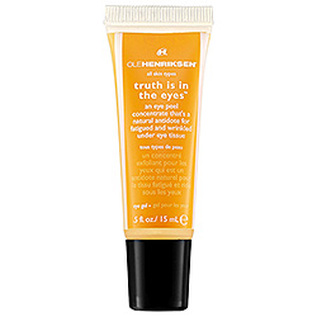
Origins Brighter By Nature High-Potency Brightening Peel with Fruit Acids, $38.50, sephora.comfavorite for delicate eye area:Ole Henriksen Truth is in the Eyes Eye Peel, $42, sephora.com-S
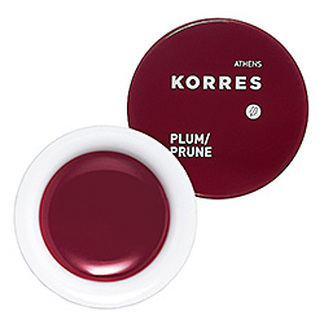
If you've bothered to pick up pretty much any fashion magazine this fall, you know that the color of the moment for accessories, bags, statement pieces (read: pretty much everything) is oxblood. Bold yet sophisticated, and flattering on almost any skin tone, the deep red shade has begun to trickle over - no pun intended - into beauty trends, too.
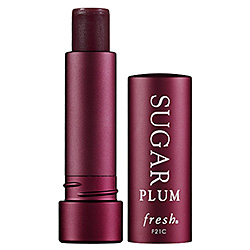
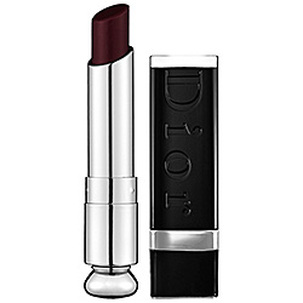
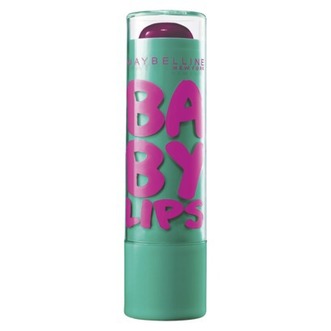
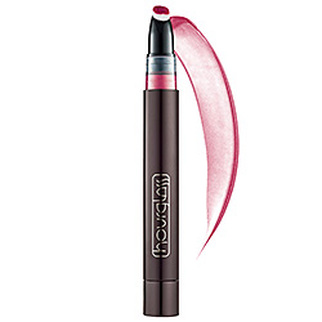
My favorite iteration has been the plum, berry and deep wine lip colors that are slightly 90s-inspired, but also decidedly current. To avoid looking too washed out or vampire-y, be sure to pair these darker hues with a rosy, shimmer-free blush for a healthy flush of color. Here are some of my favorite lip colors this fall: Fresh Sugar Lip Treatment SPF 15 in Sugar Plum, $22.50, sephora.com Dior Addict Extreme Lipstick in Black Tie, $30, sephora.com Maybelline Baby Lips Lip Balm in Grape Vine, $2.99, target.com Hourglass Aura Sheer Lip Stain in Scarlet, $26, sephora.com
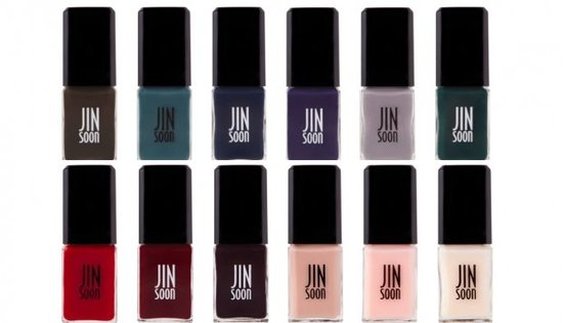
what it is: JINSoon nail polish why i love it*: It's fitting that this shiny new line of nail polishes launched in the middle of Fashion Week mayhem; their creator Jin Soon Choi is a fixture backstage, where so much Fashion Week mayhem occurs. She's basically the rockstar of the manicure world: she does all of the top shows and major celebrity photo shoots, and she has three successful eponymous salons in NYC. That's why it's baffled me for so long that she hadn't come out with her own line of nail polishes (yet somehow we live in a world where the Kardashians and Justin Bieber have). This line of polishes couldn't come Jin Soon enough (wow, I'm really sorry about that). Enter Space NK's JINSoon line. I was lucky enough to try out Nostalgia, a pinky-nude color, and I can report that these long overdue polishes don't disappoint. First, the shades: between the two "collections" (the "A La Mode" collection has trendier, bolder shades, while the "Quintessential" collection is more classic), there's really something for everyone. I'm pretty anti-shimmer when it comes to by nail polish choices, so I love that there's not one speck of iridescence in any of these shades. They also earn bonus cool points for being named by top models. But in my opinion, the formula is really what sets these nail polishes apart. I'm not kidding when I say these lacquers made it feel almost impossible to mess up even a rushed DIY manicure. The nude color I tried was opaque with just one coat, which pretty much never happens with other brands (sorry, Essie Mademoiselle). The polish goes on smoothly and dries with a super shiny finish, so you can pretty much skip base and top coat. where to get it: spacenk.com, $18 -S*This should say "why I really, really, really, really love it." Yes, I am aware that I just wrote a love letter/ode to a nail polish. Try it and you'll understand.
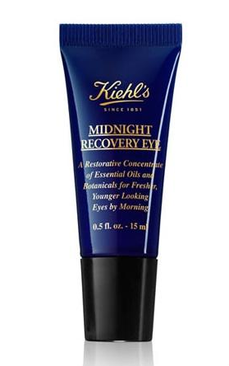
what it is: Keihl's Midnight Recovery Eye why i love it: This deeply moisturizing cream does exactly what the title claims: it helps your skin recover and bounce back from a late night or a few days of neglect. Light enough that it doesn't feel greasy but hydrating enough that it does its job, this product brightens and smoothes skin around the eyes like Photoshop in a tube. I love to use it as a base before I apply my makeup because it seals in moisture and serves as a kind of primer to help my undereye concealer stay on throughout the day. where to get it: keihls.com, $34 -S
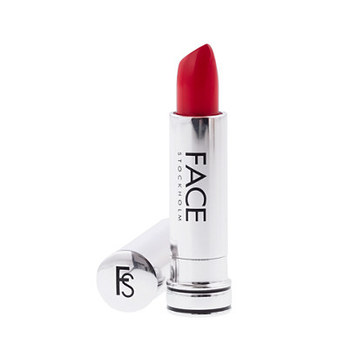
what it is: Face Stockholm for J.Crew lipstick in Chili Flake why I love it: I was doing a little browsing to escape from the NYC heat the other day, and obviously ducked into J.Crew to see what's up with pre-fall over there. I usually don't gravitate to the beauty products because of the backhaul I have at home, but at the sight of a shade called Chili Flake, one of my favorite seasonings of all time, I had to see what was inside. The picture above doesn't fully capture how amazing this shade is. It is a red, but with a touch of orange and the slightest hint of a coral that makes it more striking than almost any other red I've seen. I kept taking the top off of the lipstick and looking at its amazingness. At the time, I was just taking mental inventory of what's in store for the season, but this has been on my mind for almost a week now, so I think I might have to go pick one up, even if my lipstick collection is heaping over the tray where I store it. where to get it: J.Crew, $20 -E
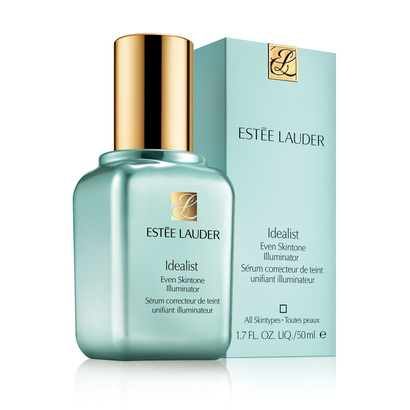
what it is: Estée Lauder Idealist Even Skintone Illuminator why i love it: This lightweight illuminator is the one thing missing in your skin care routine, trust me. Here's the reason: whenever you see a photograph in a magazine where the model's skin looks amazing, the trick behind it (besides Photoshop) is always lighting. This product creates a similar effect on your skin, even if you don't have a professional photography team following you around at all times. It evens skin tone and fades dark marks while leaving behind a light scent and subtle shimmer. I especially love what it does for skin's texture and overall luminous-ness; you really do end up needing to use less makeup, which is always a plus. where to get it: esteelauder.com, $145 -S
|
|