|
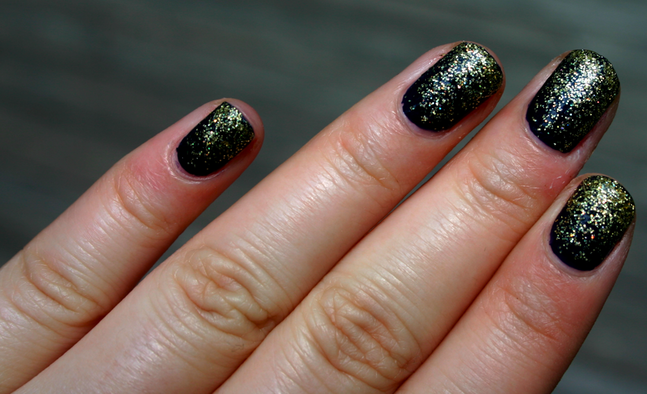
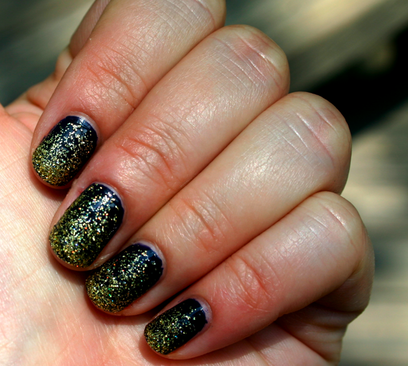
For my latest lots-of-trends-at-once manicure, I decided to combine sophisticated navy with gold glitter for an ombré effect. Too much? True, this manicure may have a lot going on, but I think the results are actually really pretty and totally wearable. Besides, we can all use a little more glitter in our lives, right? To get this look, I started with a base coat and then applied navy polish (I used OPI Road House Blues). I used two coats, and after letting them dry completely, I began to layer gold glitter polish (I used the gold glitter shade from the UO Nail Polish - Sparkle Collection from Urban Outfitters), starting with a thin layer over the whole nail, then a second coat of glitter starting halfway down the nail, and finally a third coat on just the top portion of the nail. It's really important to let each coat dry completely before moving on to the next one. Otherwise, you'll end up with a gloppy, bubbly mess, as this manicure takes a lot of polish. Finish with a top coat and you're done! -S
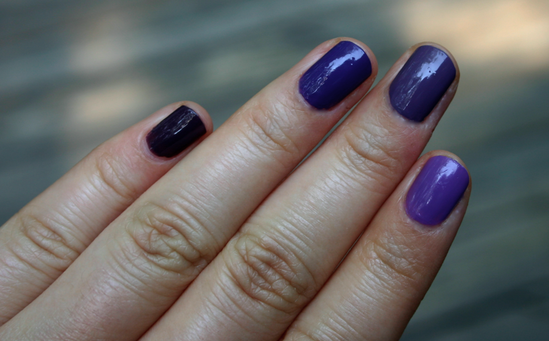
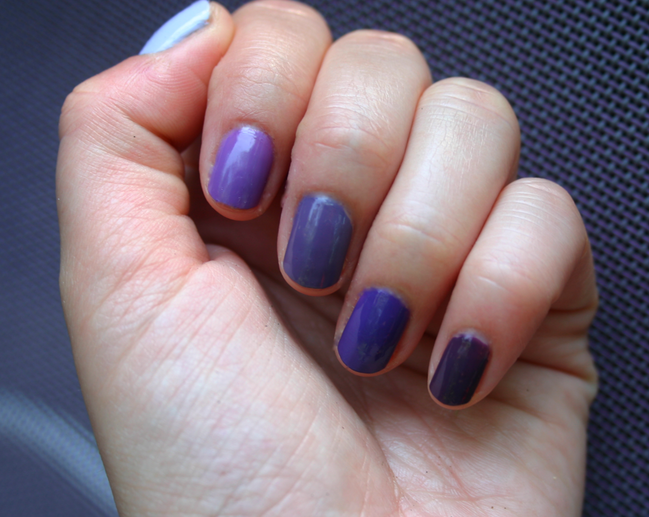
I've wanted to try out an ombré manicure for a while, but the trick was choosing a color scheme to work with and somehow accumulating five different hues of that color polish. It's not surprising that I ended up choosing purple; along with blue, it's one of those polish colors that I think is wearable in its lightest and darkest incarnations, as well as every shade in between. Thanks to my Pinterest addiction ( follow me!), I'm constantly finding new nail art ideas I want to try out. Take it from me, this is pretty much the easiest way to achieve an interesting, trendy manicure without having to fumble with a tiny paintbrush or place individual specks of glitter with tweezers (ugh).
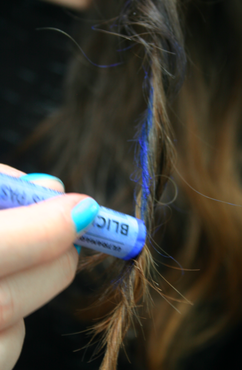
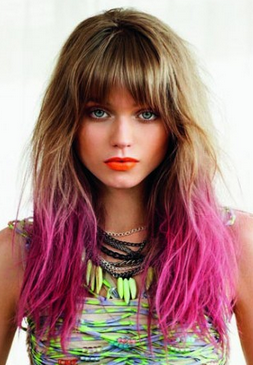 Pink dip-dye inspiration: Abbey Lee | 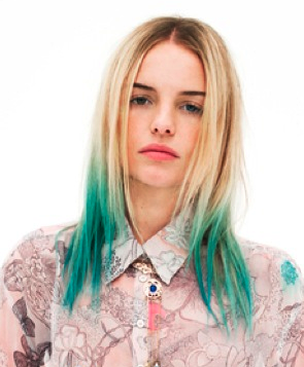 Turquoise dip-dye inspiration: Kate Bosworth | I consider myself to be somewhat of a beauty daredevil. Bright lipstick? Sign me up. Bold brows? Done. Ombré ends? Yes, please. Lately I've loved the dip-dyed hair trend (see flawless examples above), but the permanence of it totally scares me off - not to mention that I would never be able to decide on just one color. That's why hair chalking is such a great option for those of us who want to explore the trend without having to commit to it for longer than a day or two. The best part is that it's also insanely easy. Here's how to do it: Step 1: Choose your tool. Make sure you're using a "soft chalk pastel," which you can find at any craft or art supply store for a few dollars. Make sure you aren't using an oil pastel! It's best to stick with bright colors, especially if you have darker hair. Step 2: Select a 1-inch section of hair to work with. Step 3: Wet chalk (or hair) if you have dark hair. Skip this part if you have light hair, or you run the risk of staining your strands. The Beauty Department recommends spraying hair with water before chalking, but I found it a bit more useful to simply run the end of the pastel under the faucet every so often to intensify the pigment. Step 4: Twist hair between fingers and start chalking, working your way down and building color until you have reached the desired look.
Step 5: Continue on the rest of your hair.
Step 6: Brush out excess chalk and rub in the color a little with your fingers if it seems necessary.
Step 7: Avoid brushing or combing hair after the chalking is complete, as it will remove most of the color (I styled my hair before chalking so it was totally done once I finished with the color).
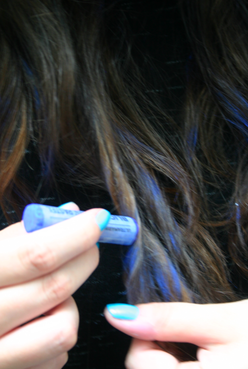
 The result isn't quite as dip-dye-looking as the inspiration photographs above, but the subtle kick of color is definitely there! A few extra tips: - You may want to put a towel on your shoulders to keep the pigment from rubbing off onto clothing. The same goes for the floor and counter, just in case you end up making a bit of a mess.
- The chalk should wash out easily with one shampoo.
-S
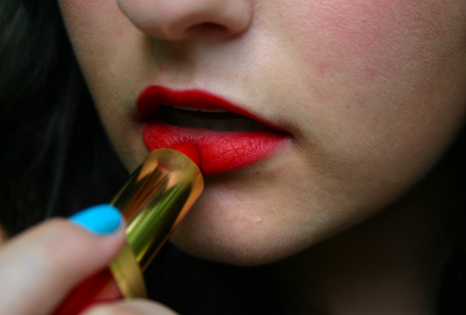
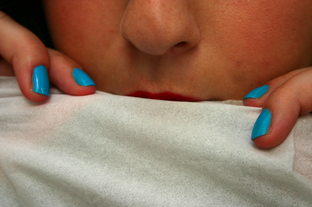
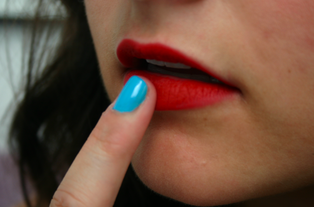
 Joan Smalls at the Diane von Furstenberg F/W 2012 show |  Lindsey Wixson at the Marc by Marc Jacobs F/W 2012 show | A classic red lip will likely never go out of style (if it ever does, nobody tell me, please). It's something every woman - and some men, like Marc Jacobs - can pull off if they simply find the right shade for their coloring. But I believe the most modern way to wear a red lip now is to keep it matte. Inspired by the runway looks above, as well as a technique I saw demonstrated by Shiseido's Dick Page backstage at Fashion Week few years ago, I give you the step-by-step guide to getting flawless, long-lasting, on-trend, runway-worthy matte red lips. First, a few tips: 1. This look absolutely works with lip colors other than red; I'm personally a big fan of orange and fuchsia as well, but I thought I'd keep it more on the classic side for this post. 2. It obviously helps if the lip color you're using doesn't have a super shiny finish on its own, but this trick will mattify most products, as long as they aren't glosses. 3. The color will last even longer if you have a good base to work with - that means smooth lips. If you need to exfoliate before getting started, I recommend simply wetting your lips and gently rubbing them with a face towel to get rid of any flakiness. Then be sure to moisturize with a good lip balm. Step 1: Carefully apply lip color to lips, making sure the outer line is exactly where you want it to be (I don't see any need to use a lip liner if you use the lipstick itself for this purpose). This will create a good base for the color. I used Estée Lauder Pure Color Velvet Lipstick in Red Velvet. Step 2: Blot lips with a tissue. Step 3: Dab finger tip in loose, translucent mineral powder makeup (I use this one from Laura Mercier) and gently press the powder into lips. Make sure the powder is completely colorless so it doesn't detract from the vibrance of the red. This step should take away any shine and create a satiny finish. Step 4: Repeat steps 1-3 again, building color to create a long-lasting matte finish. 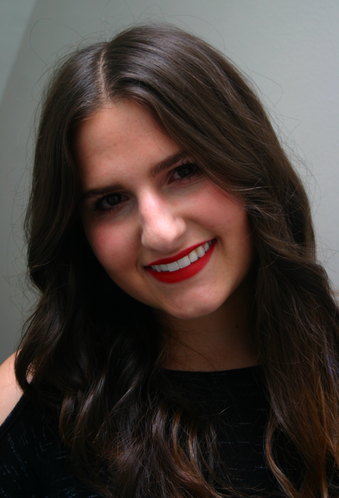 See? Now I look EXACTLY like Joan Smalls and Lindsey Wixson. This look is best worn with minimal makeup and a smile.
-S
what it is: Twistband no dents hair ties why I love it: I had been hearing about these hair ties since last summer, but it seemed that only people who were from or had traveled to California had access to them. A friend gave me one to try, and I'm now obsessed. I don't have to worry about these breaking like the hair ties I used to use, and they hold my hair up just as well, if not better, than the alternatives. Not only do these not leave a dent in your hair, I don't even feel it when it's on my wrist out of use like I did with my old hair ties. These come in an array of colors, and they make other products too, like headbands. Now that I know where to find these, I don't think I'll ever be switching back to my usual drugstore hair ties. where to get it: thetwistband.com, $2 for one hair tie (come in 3- and 6-packs, too) -E
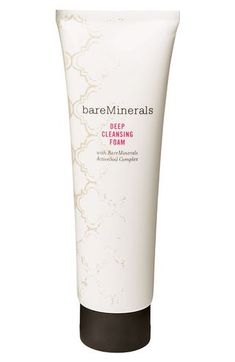
what it is: Bare Minerals Deep Cleansing Foam why I love it: This post may not be one of our most glamourous, but let's face it (pun intended): skincare is one of the most important parts of your beauty regimen. How you take care of your skin now will affect how it looks later in life. That's why I take my skincare products quite seriously. This cleanser is the highlight of my skincare routine because it's the perfect balance of gentle and effective. Just a tiny dab lathers into a creamy foam that absorbs oil and makeup while brightening and smoothing skin. This cleanser somehow minimizes pores and prevents shine while simultaneously leaving skin feeling moisturized and clean, not tight or dried out. That means it fights blemishes and wrinkles at the same time... such an overachiever. Plus, one tube lasts for a long time. I use it twice a day every day, and I'm still working on the same tube I've had for almost a year! So even though the $20 price tag may seem a bit high for something that ultimately rinses down your drain, this product is definitely a good value. where to get it: bareescentuals.com, $20 -S
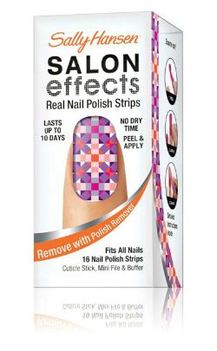
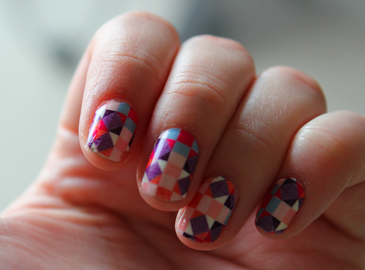
why I love it: Sally Hansen's Effects Real Nail Polish Strips make it easy for even the least manicure-capable of us to achieve stunning nail art. I especially love "Mod About You," a colorful geometric print that feels current for this summer. Just follow the simple instructions on the package and you'll end up with a manicure you won't be able to keep yourself from staring at. The strips may be a bit pricey compared with your average drug store nail polish, but if you're careful and follow all of the steps, the strips can last for up to 10 days! where to get it: Drugstores, mass retailers, Ulta.com, $10 -S
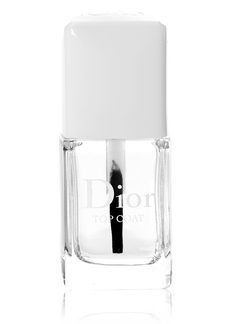
what it is: Dior Top Coat why I love it: I didn't start painting my nails regularly (read: every week) until last year, but once I did I realized the importance of top coat immediately. Top coat helps make the polish stay on your nails and makes the color look shiny and professional. Every nail polish company makes top coat, but when I accidentally came across this one, home nail painting was changed for me forever. Not only does this make nail polish dry extremely fast, my nails end up looking very shiny all week, and it makes the polish stay better than other brands of top coat I've used. The worst part about this top coat is running out of it. It comes with a bit of a price tag, but if you paint your nails regularly, this should be one of the products you use most often, so it's definitely worth the price for shiny, professional looking, well-preserved home manicures. where to get it: Dior.com, and select department stores, including Nordstrom and Bloomingdales, $20 -E
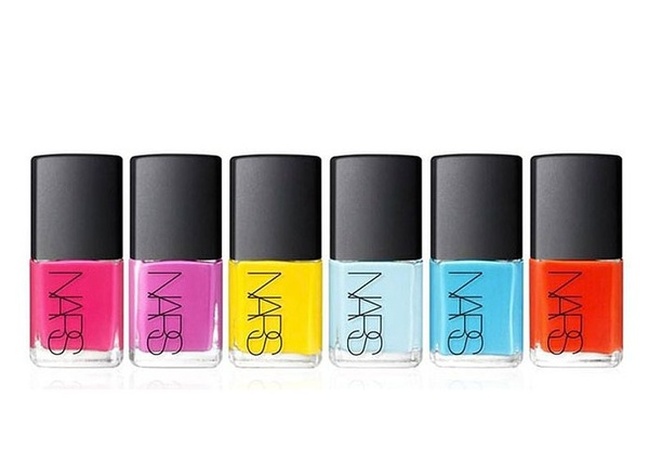 From L to R: Anardana, Ratin Jot, Amchoor, Kutki, Koliary and Lal Mirchi what it is: Thakoon for NARS Nail Polish why I love it: When I first saw the amazing/crazy/bright painted hair at Thakoon's Spring/Summer 2012 runway show, I was thrilled. After a season full of "wet" looking sporty hair and "greasy" looking anti-makeup, finally beauty editors were given something fun and intriguing to work with. That said, full-on blue or yellow painted hair doesn't exactly translate well for the average person trying to take inspiration from runway beauty. Enter the Thakoon for Nars nail polish collaboration. I first saw these sitting on a beauty editor's desk a few months ago and was drawn to them immediately because: 1. I am never one to shy away from a super bright nail polish, and 2. Every. Single. Polish. Is. Perfection. The creamy, vibrant hues are just so pretty, and they're all the kind of shades that can easily be worn on fingers or toes. I can also see some serious nail art possibilities given how great all of the polishes look together. I do think there's one major issue this collection presents, though: figuring out how to wear them all that the same time!where to get it: n arscosmetics.com, $18 each -S
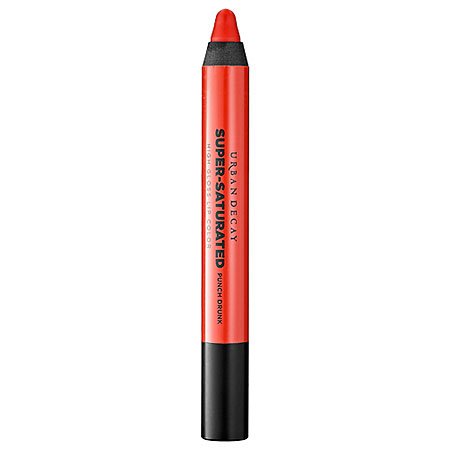
what it is: Urban Decay Super-Saturated High Gloss Lip Color in Punch Drunk why I love it: A sort of gloss/pencil/balm/lipstick hybrid, this lip color is - as its name would imply - super saturated. The texture is moisturizing without being sticky, and the color clings for hours. In the warmer months (which have finally arrived!), my go-t0 accessory is a bright lip color. This one is the perfect red-orange, and I especially love it because it's pretty much universally flattering and instantly livens up even the dullest of ensembles. where to get it: Available exclusively at Sephora, $19 -S
|
|